
The Passive/ Active Solar Heated Tiny House Studio
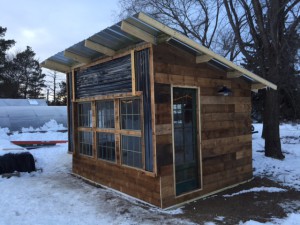
 Welcome to our latest experiment! A little building with an even littler carbon footprint. The goals were to use almost all reclaimed material and heat this small space with nothing but the sun, even on cloudy days or at night.
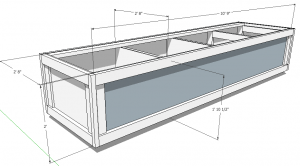
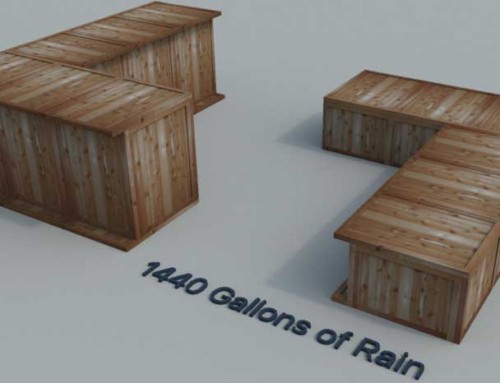
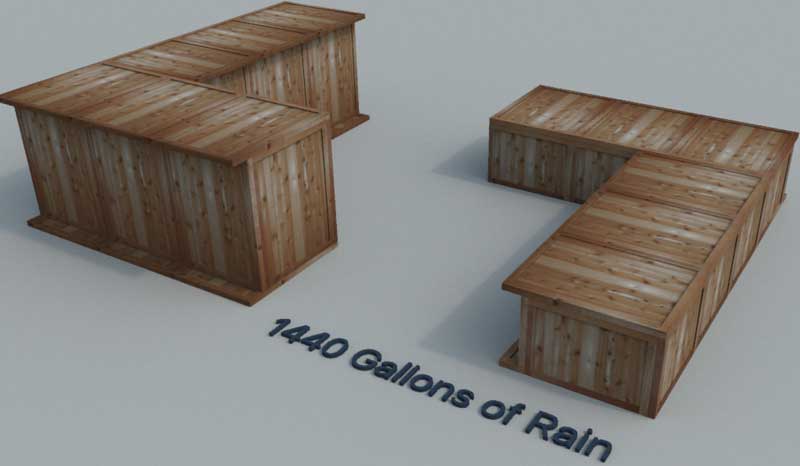
How is that possible? Store the sun’s heating energy in a large water tank and use it later when it is cold. The building is 10′ x 12′, so a big tank would have taken up all usable space, as would a line of barrels. Solution? A 400 gallon Rain bench.
If you like videos….
Scott describing his mom’s studio
Watch it come together
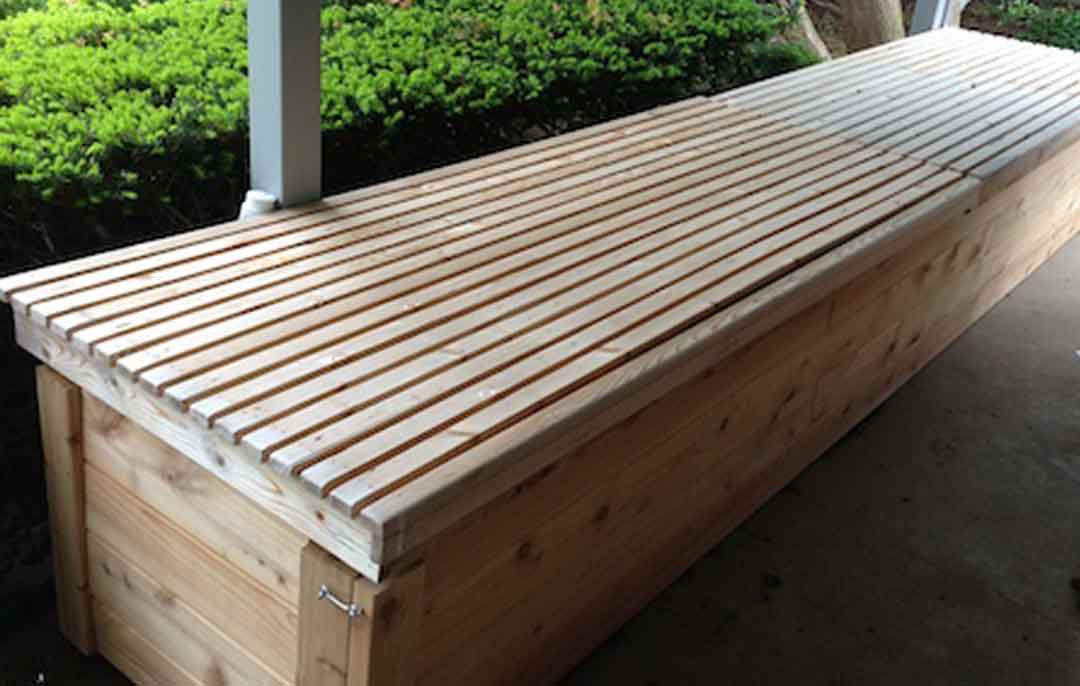
Detail of the 400 gallon Rain Bench
Every Mom deserves a getaway…
 …so when my sister asked me if I wanted to help build an art studio for our mom, I was in. Mom was leaving for Florida for a week, and the plan was to do a ‘while you were out’ and surprise her with it when she returned.
See, she does a lot. No really. A LOT. On top of farming vegetables, growing and selling perennials, repurposing old vintage stuff, painting and selling beautiful oil paintings, making stone and tile mosaics, designing a better rainwater diverter, and packaging diverters to ship when someone buys one online.
As if that’s not enough, she is retirement age and would love to retire to spend more time enjoying her family and grandkids. She just isn’t able to.
More than just a studio
 My mom is a wonderful artist, but this is for more than just that. A few years ago she started having trouble with her eyes. They would close randomly and for some reason she could not open them. After consulting multiple doctors, she finally found the answer herself online. She had somehow developed something called Blepharospasm with Apraxia, a rare disorder in which your eyes blink and hold shut. It has gotten so bad that she is not even able to drive anymore.
An Inspiration
Through it all, she only seems to get stronger. Even still, just imagine being in her shoes. How frustrating that must be. No known cause. No known cure. One of current standard treatments is botox injections right in the eyelids, every 3 months. Sometimes it helps. Sometimes it doesn’t. Another 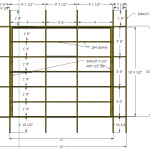 recommended treatment is spending time in direct sunlight. Mom lives in a great little house, but it totally lacks south facing windows to get sunlight, especially during a Wisconsin winter.
 Yet another thing that helps is meditation, and doing things that you love. For her, that is painting. When she is painting, her eyes stay open. So we want to make a space where she can paint more.
I can’t take credit for this idea. That was all Teri Lessig, my sister. I just tried to help out by drawing up some plans, adding a DIY solar water heater, and thermal mass via 400 gallons of functional water storage in a rain bench.
What follows is our adventure (including our Stepdad and brother) in building this, and our race to complete it before Mom got back from a trip with Grandma.
A thousand words, and some photos
I will add notes about how it works, results and hopefully a video of Mom being surprised with it, as soon as possible. I will also be making some detailed plans for building this, if anyone else is into this kind of thing…
Mom took off Monday, so we started on a Tuesday. The first step was the foundation. We wanted it super-insulated and I had found some discounted polyiso insulation on craigslist.
1. Leveling frozen ground is not ideal, but we were lucky that it wasn’t more than a few inches off, so that went better than expected.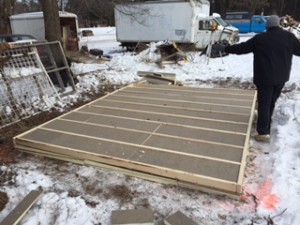
2. The first layer was 3 inches of polyiso, with an R value of 18. Then the 18″ on center floor joists (2x4s), which we added another 3″ (R-18) in between the joists.
3. On top of the joists we laid 5/8″ OSB (oriented strand board) subfloor material since we are going to cover it with a combination of laminate wood from an auction and vinyl (slate-look – left over from their bathroom).
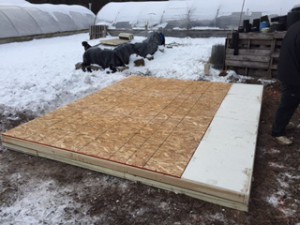 The white flooring material on the right is actually recycled plastic that was left from early prototypes of our ‘Rain Blox’ – this is where the rain bench will be in the studio. It could be subfloor, but we had this extra and wanted to try to use it.
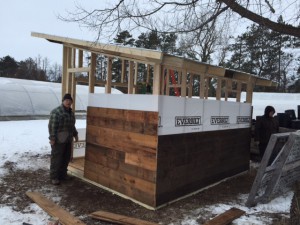
4. We actually framed all 4 walls inside the larger heated shop at the farm the first day, since it was below 0°F outside.
5. Then once the floor was done we carried the walls outside and fastened them together and to the floor.
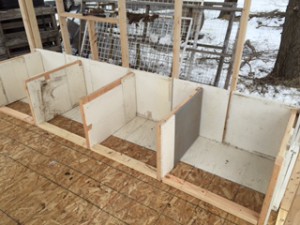 6. Then the 4 rain bench wall separators (there are 4 liners that will be installed and linked together) and attached them to the back wall and floor. Used scrap plastic lumber and 2x4s to make these.
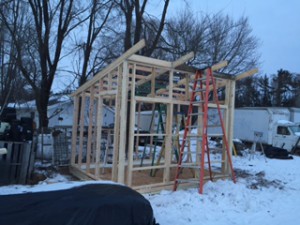
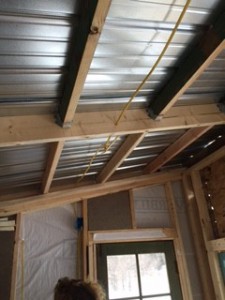
7. On with the 2×6 roof trusses! It was a balmy 20°F so we installed the roof joists in place, but we attached all of the metal joist hangers in the shop first. This allowed the…
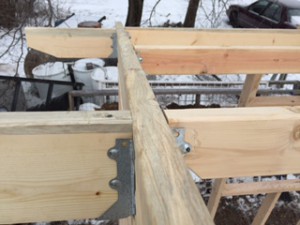 8. Roof purlins (2×4) slide right into place with the joist hangers and then nail, so you don’t have to hold them up above your head while trying to fasten.
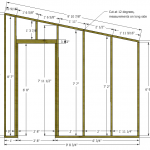
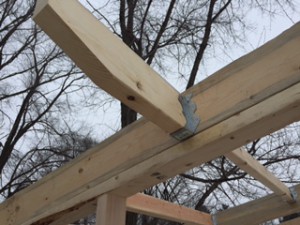 9. We added “ladders” on the sides, to make a good overhang all around. This is more than just aesthetic; it helps with both shelter over the doors and especially helps with solar heat, taking advantage of the angle of the sun between summer and winter at this latitude. It’s mostly laziness: this way we did not have to cut any of the metal roofing!
 10. Once the framing was done, here comes the roof! We used 5 full sheets of galvanized ‘Pro-Rib’, 14′ long (cost: $130). Tedious screwing every rib to every purlin, but it’s certainly secure. The screws are for metal with washers to seal away moisture. The ribs provide natural ventilation so it doesn’t need extra soffit/facia/ vents, and the metal is ideal for catching rainwater in summer.
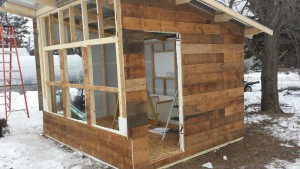
 11. While I was figuring out the water storage and solar water heat, Teri was busy cutting the siding – old reclaimed lap siding she found at an auction and only bought because they were basically giving it away. Didn’t know she’d be doing this with it! (…or did she?… 😉
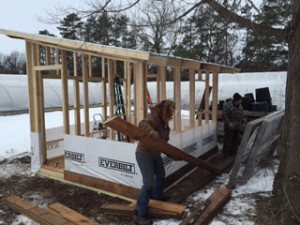
and here Teri is whipping the siding into place.
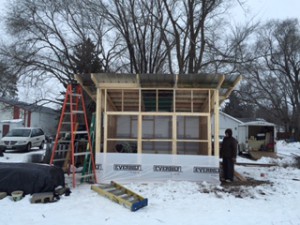
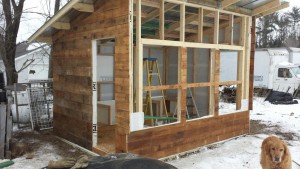
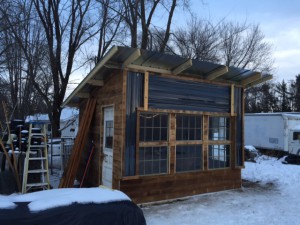
12. We wanted to get this thing closed in and insulated asap so we had a nice warm place to work on finishing the inside! So up goes the siding..
Teri and Bill finished up the siding over the weekend, just before Mom was due to come home… but wait, she’s staying another week, bonus! (not that she stayed, but that we had more time to complete it!!)
 13. With the siding in, insulation and windows are next! The secondhand polyiso cuts easily with a table saw to fit nicely between studs. Just wear a mask. The dust is pretty fine.
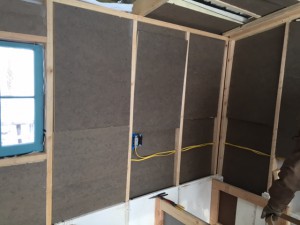
14. Along with insulation comes electrical. Drilling holes to run the wire through the studs, rigid insulation will also need to be custom trimmed to fit around wires, outlets and switches. With R-18 walls and R-30 ceiling though, it’s worth it!
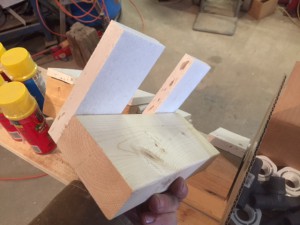 15. While Teri and Bill are working on electrical, I’m finishing the rain bench and diving into solar hot water heating! This little contraption is what can convert any storage bench or box into a rain bench. Just fasten the thicker base to the floor or front wall, and the liner will slide right between the 2 sides (shown using recycled plastic here)
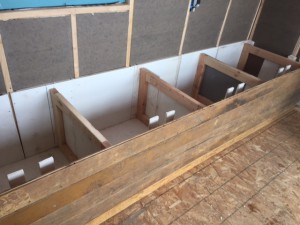 16. The front wall of the 11′ long rain bench is made with reclaimed tongue and groove siding, each piece fastened with 2 screws into each dividing wall of the rain bench. Then the 8 L-shaped liner-holders are fastened to the floor and wall and it’s ready for liners!
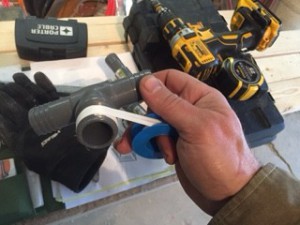
this is the way we tape the threads, tape the threads, tape the threads…
17. Taping the fittings is one more of those mind-numbingly dull things, but it has to be done so have fun with it! Put on some music, dance around, or, just sit by a nice fire and have a refreshing beverage handy. But be sure you wrap the tape this way, or you’ll likely need to retape them! (make it so when you thread the fitting in, it tightens the tape rather than undoing it)..
18. Now drill out the holes for the tubing to go between and connect all the liners. Remember to drill both upper and lower! (I forgot the uppers..)
 19. Tighten the fittings on the liners, slide them into place, and insert the tubing over all barbed fittings. Slide the hose clamps or crimp rings over the tubing before they are in place to make it a little easier on yourself.
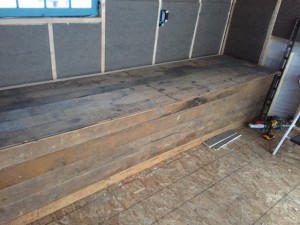 20. Aaaand cap the bench. Again, used reclaimed tongue and groove here because that’s what we had. I split this cap into 2 so it’s easier to open/ close, and part on the left is fixed since there will be permanent shelving over the left side of this bench, 16″ out. Add hinges if you want easier access.
 21. Windows! These were from an auction (surprise!), but are beautiful and all basically the same size. The siding and solar heat panels on the front were built 1/2″ longer to overlap and hold the windows from falling out. Screws were placed on the inside to keep the windows from falling in. Then small trim pieces cut and great stuff foam used to fill the gaps just before locking the windows in place with those small trim pieces.
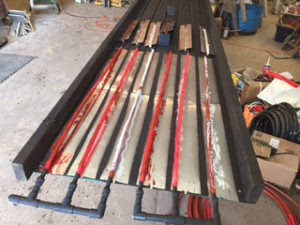
 22. My solar hot water heating panel, take 1: I used PEX with aluminum transfer plates (I had both left over from installing my own hydronic radiant floor heat in my basement). The basic design is similar to one found on builditsolar.com, with one important difference (we’ll see if it makes it better!!?) – will add those detailed plans in an upcoming blog post. All went perfectly according to plan, when…
23. My solar hot water heating panel, take 2: And this is why it is important to start and proceed with a plan. You see, my plan was in my head for this, and my plan was to draw up the plans once I had it done and working wonderfully. In all my planning , I failed to account for those 2 little side solar heaters, so I built that first panel about 2 feet too long!!!
whoops, hey look Scott messed up!
Luckily, it wasn’t so bad. I had used quick connect couplers at one critical place and that allowed me to simply slide off the 6 PEX tubes, cut them shorter, and slide them back on. Of course, I had to cut the entire wood, metal, and polycarbonate panels back, but that when pretty quick…
and notice the random kinds of silicone sealant used to connect the PEX to the metal – this transfers heat better and makes the solar heater more efficient.
24. By the time Mom got home (about 1 1/2 weeks after we started), we had it all insulated, sealed up, warm and cozy. Teri even added a nice big rug and some essential oils being diffused to get that aromatherapy thing going on…
… Current status: Mom has a small electric space heater for the moment, and when the sun is out it warms right up. As soon as the rain bench is full of water and the pump is circulating it through the solar heater, I’ll be putting an update here regarding performance! Check back again soon!
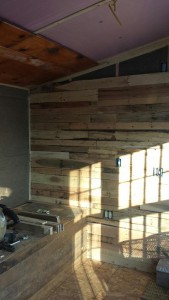
Pallet boards look great as siding once they’re cleaned up!
Mom was rather happily surprised, and has already taken over some of the finishing touches!


Leave A Comment